Over in the USA, apple cider is a soft drink that is essentially just concentrated apple juice. But we all know that traditional British cider is where it’s at… Here in the UK, apple cider is fermented, which makes it alcoholic and it is revered as being a quintessential taste of summer, a staple of the West Country and is available in a massive array of fruity regional flavours. So how can you brew your own cider at home? We’ve found an easy to follow recipe from Countryfile that can help you learn the basics.
What home brewing equipment will you need?
You’ll need: a juicer, straining bag, 5 gallon bucket open top bucket, 2 gallon bucket (you will need to drill 30 holes into the bottom), hydrometer, funnel, demijohns, measuring jug and cider bottles.
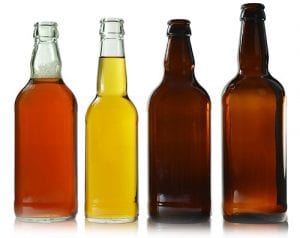
We’ve got a fantastic 30L Plastic Fermentation Bucket that would be great for making cider with, as it has a handy measurement guide printed on the side. We also have a wide range of glass beer and cider bottles with crown caps that are perfect for filling with your finished beverage.
What ingredients will you need?
Ingredients: 8kg apples, 5g champagne yeast, Campden tablets and sugar (only needed if you want to make sparkling cider). This quantity of ingredients will make 5 gallons (approximately 22 litres) of cider.
How To Brew Your Own Cider
Step 1: Pick Your Apples
If you’ve got an apple tree in your garden then great, but if not, supermarket apples are just as good. The type of apple you pick will determine the taste of your cider, so choose wisely. Bramley apples will produce a sharp, tangy cider, whilst Gala apples will create a sweeter flavour. You could even use both tangy and sweet apples together to make the perfect brew!
Step 2: Clean Your Home Brewing Equipment
Fermenting cider is a scientific process and it’s important to make sure that the equipment you’re using is free of any dirt or germs that might interfere with the process. Make sure that you soak all of your equipment in hot water for a couple of hours before use and add 4 Campden tablets per gallon of water used to sterilise them.
Step 3: Juice The Apples
Now that everything is clean and ready to go, you can extract the juice from your apples. Set up your juicer so that it dispenses the juice into your straining bag, which should be placed in your smaller straining bucket (with the 30 tiny holes drilled into the bottom). The straining bucket needs to above your larger fermenting bucket, which is where your perfectly filtered juice will end up. The straining bag and stating bucket will filter out all the tiny bits of pulp and skin that gets through the juicer’s filters, leaving you with a crystal clear apple juice. Measure the gravity of your pure apple juice using your hydrometer and record the measurement (you’ll need it later). Check out this handy guide to using a hydrometer, if you haven’t used one before.
Step 4: Add Yeast
Take a 1 pint measuring jug, fill to the top with some of your apple juice and then add 5g of champagne yeast. Leave for half an hour then stir thoroughly to disperse the yeast throughout the mixture. Divide your yeast mixture between your demijohns, then fill them to the top with the rest of your apple juice.
Step 5: Leave It To Ferment
Place your sealed demijohns in a warm place (between 15°C and 20°C) and leave them for 3-4 weeks until you have a clear cider.
Step 6: Measure The Alcohol Content
Use your hydrometer to measure the gravity of your cider. You need your cider to have a reading of 1 or less. If the reading is higher than 1, then leave the mix to ferment for a bit longer. Once you have your final measurement, then you can work out your cider’s alcohol content percentage using an ABV chart. You are aiming for an ABV of 4-5%.
Step 7: Dispense Into Bottle & Add Fizz (Optional)
You can now dispense your cider into your cider bottles. If you want a fizzy cider, then you need to add half a teaspoon of white sugar to each bottle before pouring in your cider. If you then leave your bottles for a few more weeks, your cider will be fizzy!
Step 8: Kick Back & Enjoy!
Cider is best served chilled and enjoyed on a sunny, warm(ish) British summer’s day. If you start making your home brew cider now, then you can have it ready for this summer!